Hello!
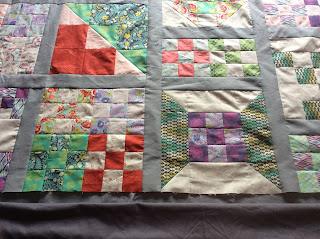
How did you all like the Bom quilt which I have called the Bakers Dozen Square Dance?
Now I will give you a break down of the strips for sashing and how I joined it all together. Please don't be overwhelmed. It looks complicated, but let me reassure you, that it is not really hard, we just need to take our time and do this in an order.
(If you do not wish to set it out like this you could sash in uniform way and use the extra 9 patches to make the border with)
I did lay this all out and move the blocks several times to achieve the right effect (with hubbies help) of my blocks and colours. I suggest you place the house block central as I have, why? I feel this draws the eye to the centre of the quilt then allows our eyes drift around all of our other blocks. It's a bit like the saying all roads lead to home.
You need to join the extra 9 patches made from the December blog as follows to form 4 x 12.5" square blocks and 6 12.5" x 6.5" rectangle blocks. These are fillers.
For the sashing strips cut 2.5" width of fabric. We need 25 strips to make the sashing and the inner border. Cut the following from the light grey border (or whichever colour you prefer)
1 x 42.5" length
1 x 34.5"
2 x 28.5"
3 x 26.5"
7 x 20.5"
Using some of the ends from the previous strips and some of the other strips cut
14 x 12.5"
then you should have 7 strips which can be used for the inner border.
From the dark grey fabric cut 4 x 6.5" squares
We can now start to assemble the quilt. Clear a space or use a design wall. I use a floor as I haven't set up my design wall.
 |
| this was my initial layout before I moved the house and played with all of the 9 patches |
I have labeled the sections and will explain each one in the following steps
Join the following Sections with a 12.5" strip.
note:- *Press all seams towards the sashing!
Firstly do section A, B, C, D, E, F, G, placing a 12.5" strip between the monthly Bom and the little 9 patch fillers.
Onto section F place an extra 12.5" strip on the outside of the 9 patch fillers
Secondarily, do section I and J making these into long pieces as in the picture.
 |
| this is a quick overview of this section which we will piece together soon |
Ok our next part of completing this top is to piece some of these sections together. So on the top of A and B we will sew a 20.5" strip, then sew both of these pieces together. Then to the left outside of this unit we sew the 28.5". Place this piece away for later
 |
| this is section A and B now know as AB |
Next sew the 20.5" to C, E, F and G.
Sew the 34.5" strip to inner part of section I as per the photo
Sew the 42.5" strip to the inner part of J as per the photo
 |
| overview of all the sections joined into units to make the complete top |
Now your top should be looking a bit like this. I have separated them all so you can get the idea of how all of the units are coming together.
 |
| top section of quilt. |
Now this will end our Part one. The next section we will deal with the partial seams and the final part of the border. If you wish you may like to cut your border out. I cut my strips at 5.75" width of fabric. I used 8 strips as to do this. I plan on giving you part 2 for the final part of this process by Friday so you can all do a lot over the weekend as I know a lot of you put your weekends away to quilt the days away. I am trying to find time to write this as clear as I can after work so I feel this is the best solution for us all.
Please let me know how you are all finding this challenge. Remember I will be doing a row by row this year but feel I should wait until April to start. I really need to complete a few things and this will give me time to get a fair amount of it together in writing anyway.
So I wish you all the very best for this week and enjoy piecing this part of the quilt together. Plus remember this is your quilt so you may piece it a standard piecing of sashing or just join them as they are if that is how you wish to do it.
have a good creative week,
Wendy.
Lets do a Happy Dancing with the Penguins!


