Showing posts with label sewing. Show all posts

Tuesday, 23 August 2016

August BOM! Finally sorry about delay folks!

Hello everyone!  I am so sorry for the lack of posts lately but lots has been happening and is coming in the future.  

I will write a post with lost of lovelies in the next few days to show you a few things that have been keeping me so far away from you all.  So now let's get down to business since we are a little later than normal.

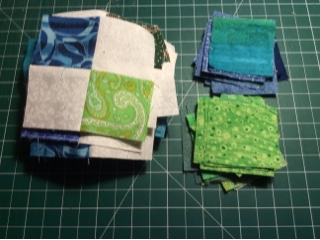
You will need two colours this time for our Block of the Month.  I decided since you have all been so patient and so many of you have been sending your loving thoughts my way we should do a friendship star block this month.

For the background please cut. 4 X 4.5" squares plus cut two squares at 4 7/8" and then cut diagonally to create 4 half square triangles
For the star cut 1 X 4.5" square and 2 X 4 7/8" squares and cut them diagonally to product 4 half square triangles
All ready to be laid out and sewn

This is how we will have the block sewn together.  So firstly sew the half square triangles together to produce four units measuring 4.5".  Press the seam to the dark side.

Next we are going to sew this block together.  I love to lay my blocks out and web them together as I sew them.  If you are new to this technique.....keep reading and I know you will just love this method.

Take the middle unit of the block and place on top of the left side of the block.  Now starting at the top sew each unit by chain piecing.  Note do not be tempted to cut the threads between these units after sewing.  Just cut it after the three units have been sewn.  See the photos below 

The first three all joined

Opened out and ready to lay the right side units on top of the middle unit of the blocks.

I pin the second and third units so that I can take it to the machine without any problems

Sewing the last of the units on in a webbing format

Before opening 

All opened, now press the outer row seams towards the background squares and the inner row towards the centre square.  This will help with the matching and locking of seams.

All pressed ready to join the rows to a block.  As this is all held with the connecting threads this is known as webbing and helps to join quilts very quickly without having to remember which way you need to lay the units for the blocks.  This is also a very good way to join blocks into rows for a quilt top also.

You can just see the connecting threads

Lay the top row onto the middle and sew together and do the same with the bottom remembering to lock in those seams to gain lovely points.  Your finished block should measure 12.5"

I really love stars so I am amazed it has taken me this long to bring this star to you!  I hop you love the friendship star like I do.

Now here are all of my machined blocks which I have pieced.  I am really enjoying this quilt coming together, I hope you are also.  Don't forget to let me know which are you favourite blocks, I'm very curious to know.


So until the next few days when I can get to let you know what has really been happening with lots of eye candy for you.  Have fun finally with your August Block of the Month!

Until next time have fun,

Wendy xxx

Friday, 10 June 2016

Ready, Set, Sew! Winter Mystery quilt along!

The time has arrived to reveal the first clue!  Hope you are ready!  If you missed the first blog post with the requirements you can find it here.
Ready? Set? GO!

For this weeks clue you will need just your background and your dark fabrics which you have chosen.  So let's begin!

My colour selection - answered

I decided I wanted a bit of variety in my quilt and not just three colours.  So I have chosen green and blue as my darks so to speak.  These are both next to each other on the colour wheel so they will blend well.  I haven't worried that they are lights or darks just that they show blue and green or a mix.  

For my medium I decided to use pinks and yellows, these have two colours between them on the colour wheel and go together well plus they are two colours away from the green.  You could work the opposite way or chose and fabrics like this in a combination you like.


my fabrics from stash

Cutting Instructions

Ok you will need to cut 2" strips from your background fabrics,  I have actually used partial strips as I am busting my stash for this little quilt and I want variety to create movement in my quilt
You will require 288" in length overall

From your dark fabrics cut the same amount of 2" strips plus an extra 36, 2" squares and put these squares aside for next week.
colour wheel
Cutting Instructions

Ok you will need to cut 2" strips from your background fabrics,  I have actually used partial strips as I am busting my stash for this little quilt and I want variety to create movement in my quilt
You will require 288" in length overall

From your dark fabrics cut the same amount of 2" strips plus an extra 36, 2" squares and put these squares aside for next week.


strips ready for piecing
Strips cut and waiting to be paired and sewn.  I lay might out like this, I take a background strip and then I put another coloured strip on top and sew together.  If the fabrics are different sizes I just sew to one is complete and add another as the photos below show you.

let the piecing begin

sewing a 1/4"
Once these are all sewn, take to the pressing board and press with the seams towards the dark fabric. 
Then off to the cutting mat where we sub cut these strips into 2" just like the photo below.  We require a total of 72 (2" X 3.5" strips) of each colour 

Subcutting strips

subcut pairs
Strips all subcut ready for pairing and piecing into four patch blocks.  Don't worry if you have a few extras you may like to use your favourite combination and swap some around later.

ready to make four patches
Now off to the machine to sew these babies together!

final seams happening for this week!
Sew the four patches together using the 1/4" seam.  Remember to make sure you butt your seams to each other so your centre of the block, this will ensure they match nicely.   Just like below. 

unpressed block straight from the machine
After you have sewn your units please go and press them all. They should measure 3.5" now
And you should have a total of 72 four patches. 
Patches to be put away ready for next clue

Clue 1 complete! Yay!
Above you will see the extra squares with the four patches all complete.  Now I would love to see all of your creations.  So remember you can come over toWehago Designs Quilting Community Group on Facebook the or hashtag your photos on Instagram with #wintermystery2016 and follow me on Instagram @wehago.  I also have a Facebook page Wehago Designs and I plan on putting this pattern on my website once we complete the quilt and it will be a free downloadable pattern.

So off you head to the cutting board or the fabric stash and start your creation.

So looking forward to seeing this come together all over the world, and many thanks for coming with me on my quilting journey. 

Have Fun

Wendy

Sunday, 5 June 2016

Whooping for the Weekend to finish with a slow stitching Sunday!

Hello Everyone!  How are you all on this weekend?

Firstly would just like to say I am linking with the following and thank them so much for the opportunity to link to their wonderful blogs.
The first two for a couple of finishes that can't be shown yet, but mostly for getting back to sewing my winding ways quilt top and for loading my oldest UFO quilt back onto the frame to be hand quilted.  I'm really doing a happy dance and I am whooping the town down this weekend for this.


I am really loving the way this winding ways is coming along.


Then I managed to sort through my fabric scrap bins and pull these fabrics for the mystery I will be sharing with you.  Yes, if you missed my last post I am going to be doing a mystery quilt for Winter.  Since my BOM blog is due in two days I will share the first clue on Friday with you.  I hope you can come and join in on the fun of this mystery.  Just in case you need the requirements Here is the post you need

My yellows and pinks are my mediums, my lights are my backgrounds and all tone on tone whites and my darks are my blues and greens.  Whilst they might not be truly lights, mediums and darks they will work as the colours are different.   I will use a few more pinks than the yellows and the blues and greens will be around the same.

Now to end the day with slow stitching, I have pulled out my oldest UFO called Decades of Stars.  This quilt commenced it's life around 15 years ago.  This quilt is dedicated to all of the loved ones who have departed this earth and now watch over me.   The special lady who carefully picked out a fat quarter from an Amish shop in Pennsylvania all those years ago is now looking down smiling that this quilt is being finished.  
The stitches from a few years ago.   I am not happy with what I did in the corners so I will remove that and redo but I just love this cable.  I am looking forward to writing on this label. 
Look at how it looks on the front!
So I will do a few needles of thread each day and am hoping this will be off the frame in the next month and I will start the next special quilt in my life for someone.  


So I hope you have had a great weekend, please take a couple of moments and say hello and let me know what you have been doing or just let me know you are cheering me on with my UFO or joining with me for the mystery.

Keep smiling and keep creating it's great for our soul!

Wendy.  

Friday, 3 June 2016

Winter Mystery Quilt-Along 2016


Well are we ready for a bit of creativity as we start our winter to keep our souls nice and warm. Yes I am in the southern part of Australia and we are just starting our winter.  So far it hasn't been to bad, we don't get snow where I live jus lots of rain and sludge often and cold winds to chill you to your bones.  

It is at this time after completing or almost completing a lot of quilts recently that I need to sort out my scraps and what better way to sort than to sort with a quilt in mind.  Well I have one.  It will be 54" without borders.  If you want to make it a bit bigger you might just have to make a few more blocks.  So tomorrow I will start sorting my fabrics but I have got some fabric requirements ready for you to join me in this mystery! 

I hope you are excited because I certainly am.  I am planning to make mine scrappy.  
Now for the requirements:-
For your background you will need 2.5 mts (2 3/4 yds)
Now the next lot of fabrics you will require will the the opposite of this colour.  For example if you are using a light then you will need to use dark fabrics, if you are using a darks for background use a lights for this fabric and you will require 1.15 mts (11/4 yds)
And of your medium fabrics you will require  3 mts (3 1/4 yds).

Now I hope you are excited to look in your scrap heap this year and join with me.   Don't forget to put a new needle in your machine, fill your bobbins and most importantly put a new blade in the rotary cutter.  I'll be back during the weekend most likely Sunday with your first Clue. Don't stress if you don't have all of your fabrics sorted it will work out and you will be able to gather them as we go.  

Now I must go and get some sleep so that this will all fall into place.

So until the first clue is released, have a wonderful time discovering fabric you had forgotten about.

Let's warm the creative juices of the souls,

Wendy