Hello! Well I am finally back to complete this top!
I can't believe it has taken so long to come back to you all!
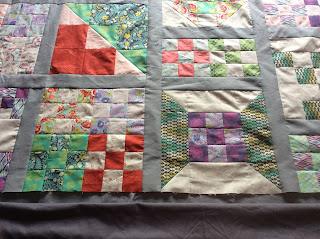
Anyway below is the photo where we left this quilt top
 |
| lets get this baby together |
The following are photos of the sections we will deal with
 |
| this will be our first section to deal with |
We will add the grey strip under the dutch 9 patch but only sew it partially through like in the following photo and then put the small dark grey block on the start of the grey from the left of the block as per the photos
 |
| first partial seams |
 |
| pin these pieces like this ready for the next lot of piecing |
then sew these two units together down the completed sashing strip
 |
| it will now look like this |
You can now add the section below with the 9 patches this to this unit.
We will now continue with the rest of the piecing.
 |
| Now we will continue with the partial seams as pinned in above photo |
lets put the following small squares onto the sashing on the following unit as per the photo leaving the seams partially done so the top square unit will not be sewn fully to the bottom only the top part of the sashing and the bottom one will be sewn to the outer of the piece below the nine patches and fully to the inside of the long sashing.
 |
| now we are getting pieces together |
Next we will piece the two of these units together and we almost have the top half complete
 |
this will now come together
|
 |
| in a wider view of the units |
Now we will piece the house onto the 9 patch and the friendship star piece starting at the small dark grey square and sew down the sashing.
 |
now the house is onto the top part of the quilt
|
 |
| close up of how this will come together |
Next we will sew the top part we have just sewn together with the lower section
 |
| sew these two pieces together |
 |
| to look like this |
We will now sew the top two pieces together.
 |
| we will firstly sew the centre seam down |
 |
| then the seam above the house |
We will now connect the next long section from the bottom to below the house but by the sashing only then we will connect it just below the house
 |
connection of the second last unit of the quilt
|
lastly we attach the last piece. I attached the long piece then i did the last partial same from the square near the house.
 |
| This is how the lower now looks |
Ta Da! the Bakers Dozen without a border
 |
| Flying in the breeze |
I decided I wanted a bit of a cool border of this so I have decided to use this text print fabric that has been in my stash. Now measure your quilt top in the centre of horizontal and vertical plus the ends and sides then take the average and cut your borders to that size and attach them
 |
| text fabric from stash |
Now i have cut my side borders and attached these then I have attached the top and bottom borders.
Complete Bakers Dozen Quilt Top!
 |
| yay! |
Now I am so sorry this has taken so long to complete this post. I plan on having this quilt top quilted by end of July. I managed to get to the Australian Quilt Convention and was very pleased to meet the wonderful Angela Walters of the Midnight Quilt show
here is a link to her blog. I did a free motion quilting workshop with her and I am even more motivated now.
So I hope you are excited to finish. If you have finished and placed yours another way I would love to see it. Maybe if you're not in my Facebook group you could tag me on Instagram or even come and join us at
Wehago Designs Quilting Community
Until next time happy quilting, happy life,


