Showing posts with label #wehagodesigns. Show all posts

Monday, 15 May 2017

Bakers dozen final piecing instructions

 Hello!  Well I am finally back to complete this top!

I can't believe it has taken so long to come back to you all!

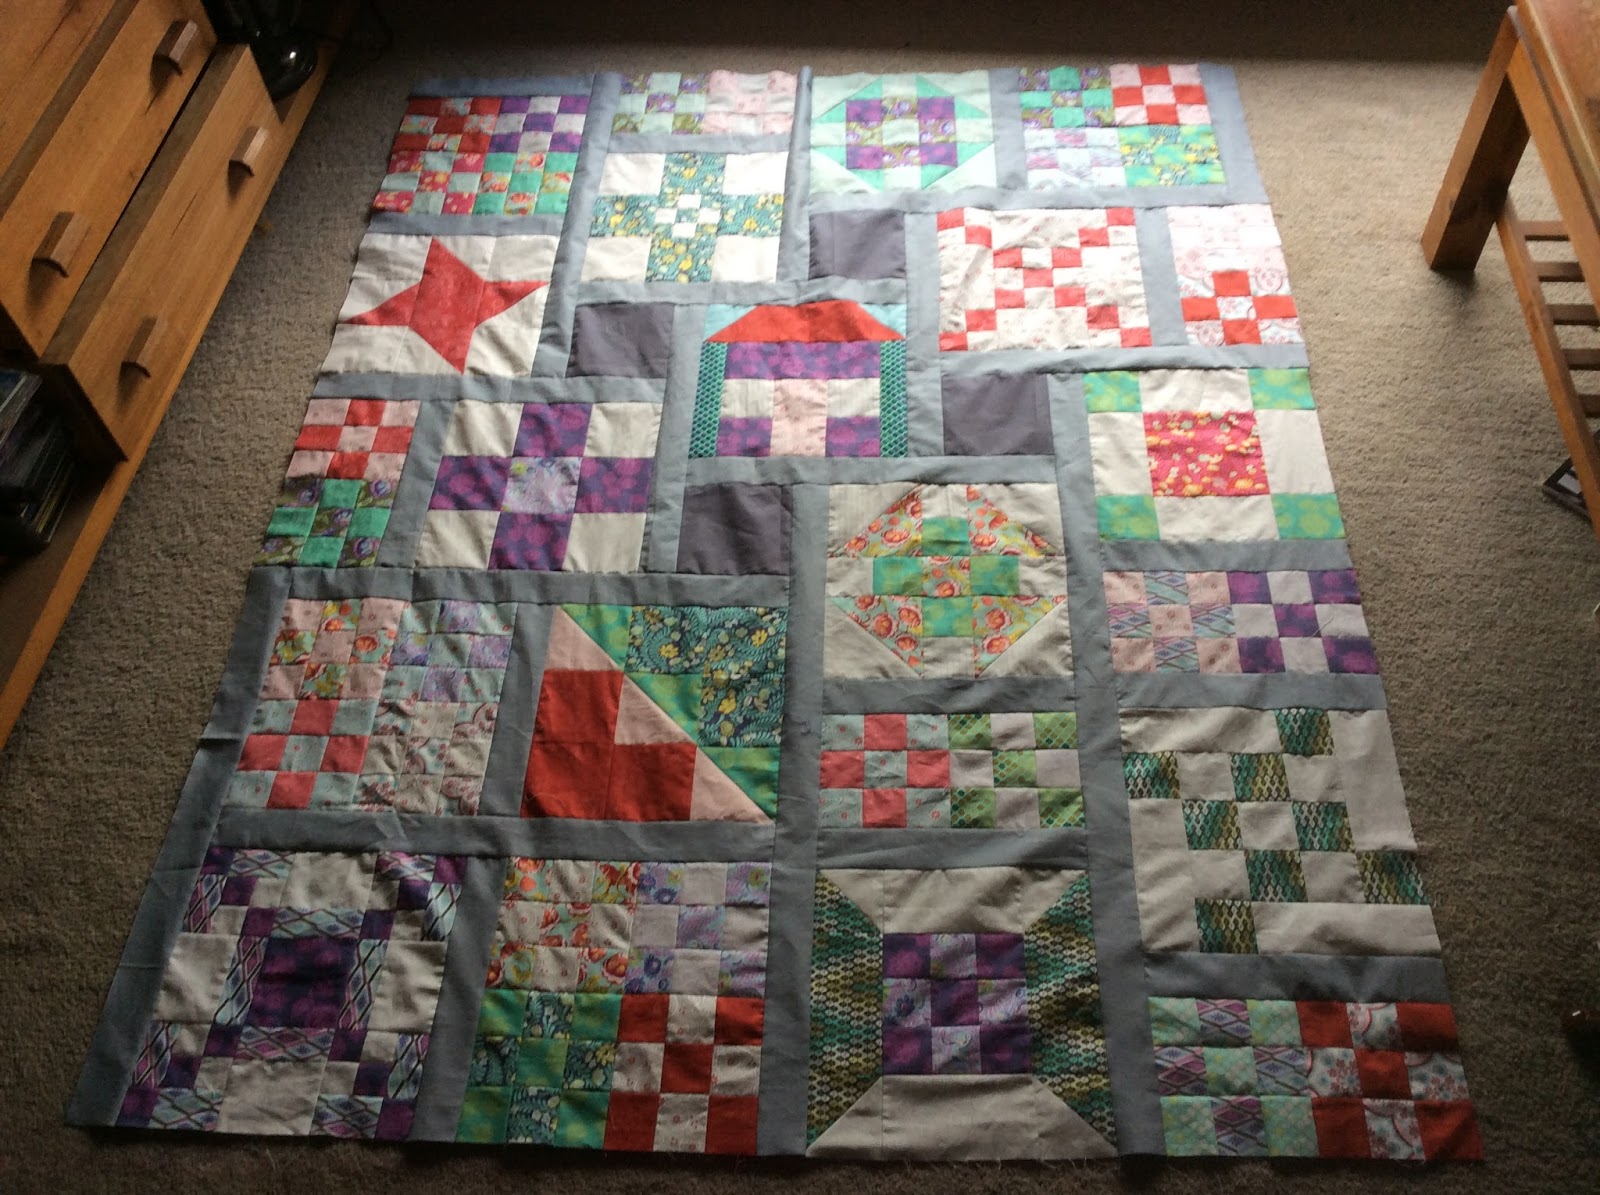
Anyway below is the photo where we left this quilt top

lets get this baby together 
The following are photos of the sections we will deal with

this will be our first section to deal with
We will add the grey strip under the dutch 9 patch but only sew it partially through like in the following photo and then put the small dark grey block on the start of the grey from the left of the block as per the photos

first partial seams
pin these pieces like this ready for the next lot of piecing


then sew these two units together down the completed sashing strip
it will now look like this
You can now add the section below with the 9 patches this to this unit.
We will now continue with the rest of the piecing.
Now we will continue with the partial seams as pinned in above photo 
lets put the following small squares onto the sashing on the following unit as per the photo leaving the seams partially done  so the top square unit will not be sewn fully to the bottom only the top part of the sashing and the bottom one will be sewn to the outer of the piece below the nine patches and fully to the inside of the long sashing.

now we are getting pieces together
Next we will piece the two of these units together and we almost have the top half complete


this will now come together
in a wider view of the units
Now we will piece the house onto the 9 patch and the friendship star piece starting at the small dark grey square and sew down the sashing.


now the house is onto the top part of the quilt

close up of how this will come together
Next we will sew the top part we have just sewn together with the lower section


sew these two pieces together

to look like this
We will now sew the top two pieces together.

we will firstly sew the centre seam down

then the seam above the house
We will now connect the next long section from the bottom to below the house but by the sashing only then we will connect it just below the house

connection of the second last unit of the quilt
lastly we attach the last piece.  I attached the long piece then i did the last partial same from the square near the house.

This is how the lower now looks

Ta Da!  the Bakers Dozen without a border

Flying in the breeze


I decided I wanted a bit of a cool border of this so I have decided to use this text print fabric that has been in my stash.  Now measure your quilt top in the centre of horizontal and vertical plus the ends and sides then take the average and cut your borders to that size and attach them  


text fabric from stash
Now i have cut my side borders and attached these then I have attached the top and bottom borders.

Complete Bakers Dozen Quilt Top!


yay!

Now I am so sorry this has taken so long to complete this post.   I plan on having this quilt top quilted by end of July.  I managed to get to the Australian Quilt Convention and was very pleased to meet the wonderful Angela Walters of the Midnight Quilt show here is a link to her blog.  I did a free motion quilting workshop with her and I am even more motivated now.   

So I hope you are excited to finish.  If you have finished and placed yours another way I would love to see it.  Maybe if you're not in my Facebook group you could tag me on Instagram or even come and join us atWehago Designs Quilting Community

Until next time happy quilting, happy life,

Wendy


Monday, 9 January 2017

Bakers Dozen Square Dance! - BOM 2016 Reveal!


Bakers Dozen Square Dance!


Well It is together!  Thanks to all who have played along this year!  I have been called into work a day early so I will give you the reveal now and let you get your sashing and border fabric out and cut into strips.   

Tonight I will give you the breakdown and how to get this together.


all of our blocks   
Now you will remember the spit 9 patch, it was bothering me, so I went and made a new one
redone block!
Now I was happy with this result so I replaced it in the mix!


before the replacement of the split 9 patch

starting of arranging of the blocks

final arrangement of the blocks in the quilt
Finally together just before the setting sun, so outside to get a photo for you all of it hanging on the line without the borders!

together without boxers
Then after a little bit of work during the night and some sleep, a quick photo before going to work of the top outside on the line with the borders this time!

Ta Da!

Bakers Dozen Square Dance Quilt!

You will need 1.35 mts or 1.5 yds of light grey for sashing, 8" strip of dark grey and 1.2 mts or 1 1/3 and a little bit for the outside border.

well I must bid you good bye and get to work on time!  you may cut your light grey into 2.5" strips and you will need 21 strips for the sashing.  

Our quilt measures 71.5" x 85"  and I can't wait to get it all quilted.

Until tonight have a great day 

Wendy.  
ps don't forget to leave a comment!  :)


Friday, 6 January 2017

9 Patch Update for the Bom Bakers Dozen 2016

 Happy New Year!


Well it has been a bit warm here today!  We reached 36 degs celcius.  My plan was to sew most of the day but I did have to help hubby do a few things outside, so sewing was interrupted.  So I will show you the progress with my final post tomorrow with the top being completed! 


I start by placing all my 9 patches out like this ready for webbing together

I then start sewing them
I take them off the pile from the left and chain piece


progress photo
all blocks webbed and pressed ready to sew into the blocks

some blocks complete
28 blocks complete and pressed
So now these are all done I am very happy.  I have cut all of the hand pieced blocks but yet to cut all of the 28, 9 patch blocks but that should happen tomorrow and these will be all bagged up to do during my lunch time etc at work.  I am very excited to show you the layout I have come up with.  I will be adding a couple of solids for sashing next so I hope you stay tuned and check back in to the blog tomorrow for an update!

I trust you are having a great start to the New Year!  I am hoping to complete about three small quilts this coming week.  I do have the tops done and they just need basting and quilting so lets see how tomorrow and the rest of the week goes.  

Until tomorrow, have a great night or day whichever it maybe on whichever side of the world you maybe,

have a great creative day!


Wendy

Friday, 9 September 2016

September Block of the month!


Happy spring to everyone from my side of the world!  

Well after a few busy weeks, I am finally getting back on track and a bit more organised.  I decided to get this block to you on time.  I have also cut up all of the hand pieced blocks I am behind on and I have them all bagged up so I can just do some hand piecing when waiting or just wanting some quiet time.

So I have decided to introduce you to the Chinese Coin Quilt Block.  


Fabrics I have chosen for both blocks
Go to your stash and find four fabrics, you maybe able to use up some of the scraps that have been made from the previous blocks.

You will need to cut the following
Background cut 2 squares at 5 5/8" then cut diagonally to give you four half square triangles
                           5 squares at 2 7/8"
Fabric A             4 squares at 2 7/8"
Fabric B             4 squares at 2 7/8"
Fabric C             cut 4 squarest at 3 1/4" and then cut diagonally to give you 8 half square triangles

pieces ready to be laid out
pieces all laid out ready to sew

We will start by sewing the centre squares which form a cross in the middle of the block.  Sew a background to the fabric A and press seam towards fabric A.  Then join the centre background square between a 2 pairs which you have just sewn, this will form the middle strip unit of the block.  
starting of the sewing
Next we will sew the small triangles of fabric C to a square of fabric B and press the fabric towards the triangle.  Then proceed to sew the other small triangle of fabric C to the other side to form the half square triangle as follows.


sew the small triangles onto squares
sewing the small triangles to make the half square triangle

sewn units ready for sewing
Next we will sew the Background half square triangles to the pieced half square triangle units as per the following photos.
sew hst to the pieced half square triangles
all units ready to sew
All pieces are now sewn into units.  we will now join the corner squares to the rectangle units to form three rows of units to make the block.
in rows
Continue sewing and sew the rows together to form a Chinese Coin Block!
completed and pressed block

And here are all of my sewn blocks so far!  I am loving this one.  As I owe you your bonus block I am hoping I can get that out to you all soon.
all 9 blocks so far
I will endeavour to give you another blog post over the weekend.  I have a few little projects and squeals to share with you.  So until then I hope you love this block like I do.  Don't forget to leave a comment and say hello.  I would love to know what your favourite block is so far, so how about that as this months answer as a comment on the blog....which block is your favourite?  For me I think I really love the Greek cross and this Chinese coin along with Puss in Corner.  

So don't be shy,  leave a comment.

Happy Sewing and Happy Weekend!

Wendy.